本帖最後由 ssal 於 2010-11-11 12:18 AM 編輯
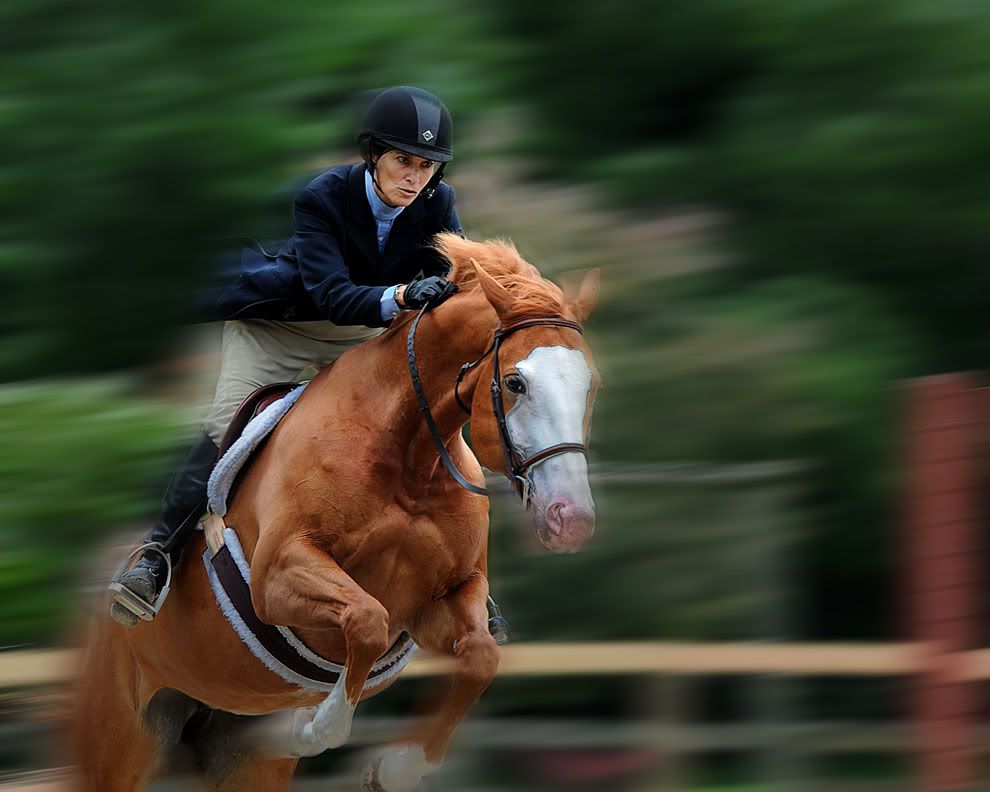
I am sure most of you, by now, have drawn the conclusion that this image was not a real pan/action shot, but a special effect as title stated, and as what I implied in the first post.
This was a special effect I rendered with Photoshop Motion Blur filter. I am going to talk about how it was done.
First, choosing the subject. Subjects like people running, people riding bicycle, moving car, running horse, kid play ball, skating, etc. are ideal. Generally, you want to compose your picture horizontally because your subject is running horizontally as well.
Second, choosing the background. In a normal shot, we look for simple, plain background so the picture is not cluttered. But for the special effect, you want to have something in the background to give the reference that the subject is "moving". Don't worry about clutterness becausee once you blur it, it will look fine.
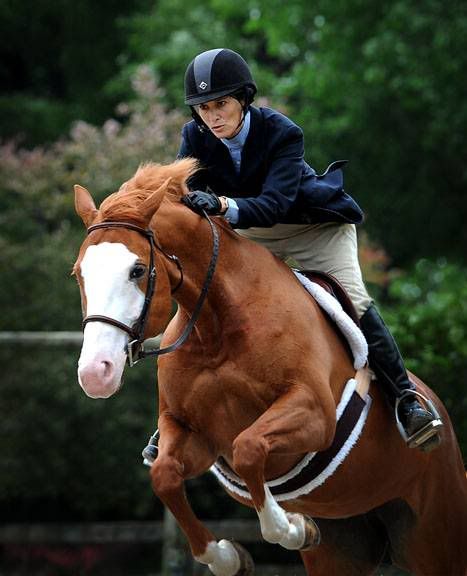
When you shoot the moving subject, use high shutter speed like 1/500 or 1/1000 to "freeze" the subject so the subject would be crystal clear. The large aperture would also separate the subject from the background.
Now the editing in Photoshop.
First do you normal editing like cropping, leveling, dodge and burn, etc. to arrive at a final image, before the special effect. I am going assume that you will merge all the layers to arrive at a single layer image at this point.
Use Ctrl-J twice to create two copies of the background layers. Now you have three layers. Name the top layer "clear layer", and the middle layer "blur layer".
Click on the eye of the clear layer so it is invisible.
Click on the blur layer so it becomes the active you're working on.
We are going to apply the Filter/Blur/Motion filter to this layer. But before I do that, I am going to turn this layer into "smart object" first. Normally, filter is destructive and non-reversible after you apply it. With smart object, your filter becomes a smart filter that let you adjust it afterward.
To turn the blur layer into a smart object, right click on the blur layer and select "smart object".
While still on the blur layer, apply Filter/Blur/Motion filter. In the dialog, you can adjust the angle of the motion, and you can adjust how much blur you want to apply. Don't worry about over or under doing it because, with smart object, you can come back and adjust it later.
Now click on the eye of the clear layer to make it visible. The image you see now is crystal clear because the top layer blocks out the blur layer beneath it.
In the final image, we want the clear subject to be a little ahead of the trailing bluriness to give the feeling of motion. On the clear layer, select the move tool (V). Use the left or right arrow key to nudge the clear image ahead of the trailing bluriness. If the motion is from left to right, nudge it to the right, and vice versa. You want to nudge it just about 3/16" of an inch but not much. Again, you can adjust this later in the finishing touch.
Now you want to bring back the bluriness of the background so the subject would appear to be moving.
On the clear layer, activate a mask by clicking on the "add vector mask" icon in the pallet. Make sure that the mask is active by clicking on the mask before you work on it.
We are going to hide the portion of the clear layer by painting on the mask. First, pressing the letter D to turn the color in the black/white (watch your tool bar). Pressing the letter X will rotate the top color to black or white. To hide, you want to paint with black.
Select the brush tool and proper brush size. Adjust the hardness of the edge of the brush in the brush tool dialog. Generally, you don't want any hardness at all with the brush.
Again, make sure that you're working on the mask of the blur layer by clicking on the mask on the right first. Now move the brush to the image and start to paint on the background. You will see the clear image going away and the blur background will appear.
Well, how much you paint and how you paint is all up to you. Pay attention to the edges of the subject to get the desired effect you want.
If you want to undo the hidding, you can press the X key to pick up the white color brush. Painting with white undo the hidding.
Final touch. You can adjust the amount of bluriness by clicking on the smart filter in the blur layer. You can also nudge the clear layer to get the desired effection of motion.
This technique assumes you have a good handle in working with mask, and smart object. For those who have questions, I will be happy to answer them.
Thanks. |


 發表於 2010-11-9 05:36 AM
|
發表於 2010-11-9 05:36 AM
|